How to Schedule Canva Designs to Social Media in 2026
If you make most of your social graphics in Canva, you already know the chore. You finish a carousel, hit Share, pick "Download," choose PNG or JPG, wait, find the file in your Downloads folder, drag it into your scheduler, and then realize you exported the wrong size for Reels. The design takes ten minutes. The export-and-upload loop takes another ten. Multiply that by the number of posts in a week.
The fix is to skip the loop entirely. With the right setup, you can schedule Canva designs to social media without ever leaving your scheduler. This guide walks through the workflow we recommend at Minopa, so you can go from "design done" to "post queued" in under a minute.
Why the Canva-to-scheduler loop wastes more time than you think
A single export feels harmless. It's the cumulative cost that hurts:
- You forget which version you exported (v3 final final?) and re-download.
- You lose the design's original Canva link, so when a client asks for a tweak, you re-find it manually.
- You upload it to one scheduler, then to a different scheduler for a different brand, twice.
- You re-export at a new size when you realize Instagram is square and LinkedIn is landscape.
For a creator posting four times a week across three platforms, that's twelve export cycles. None of them are creative work. They're shuttling files.
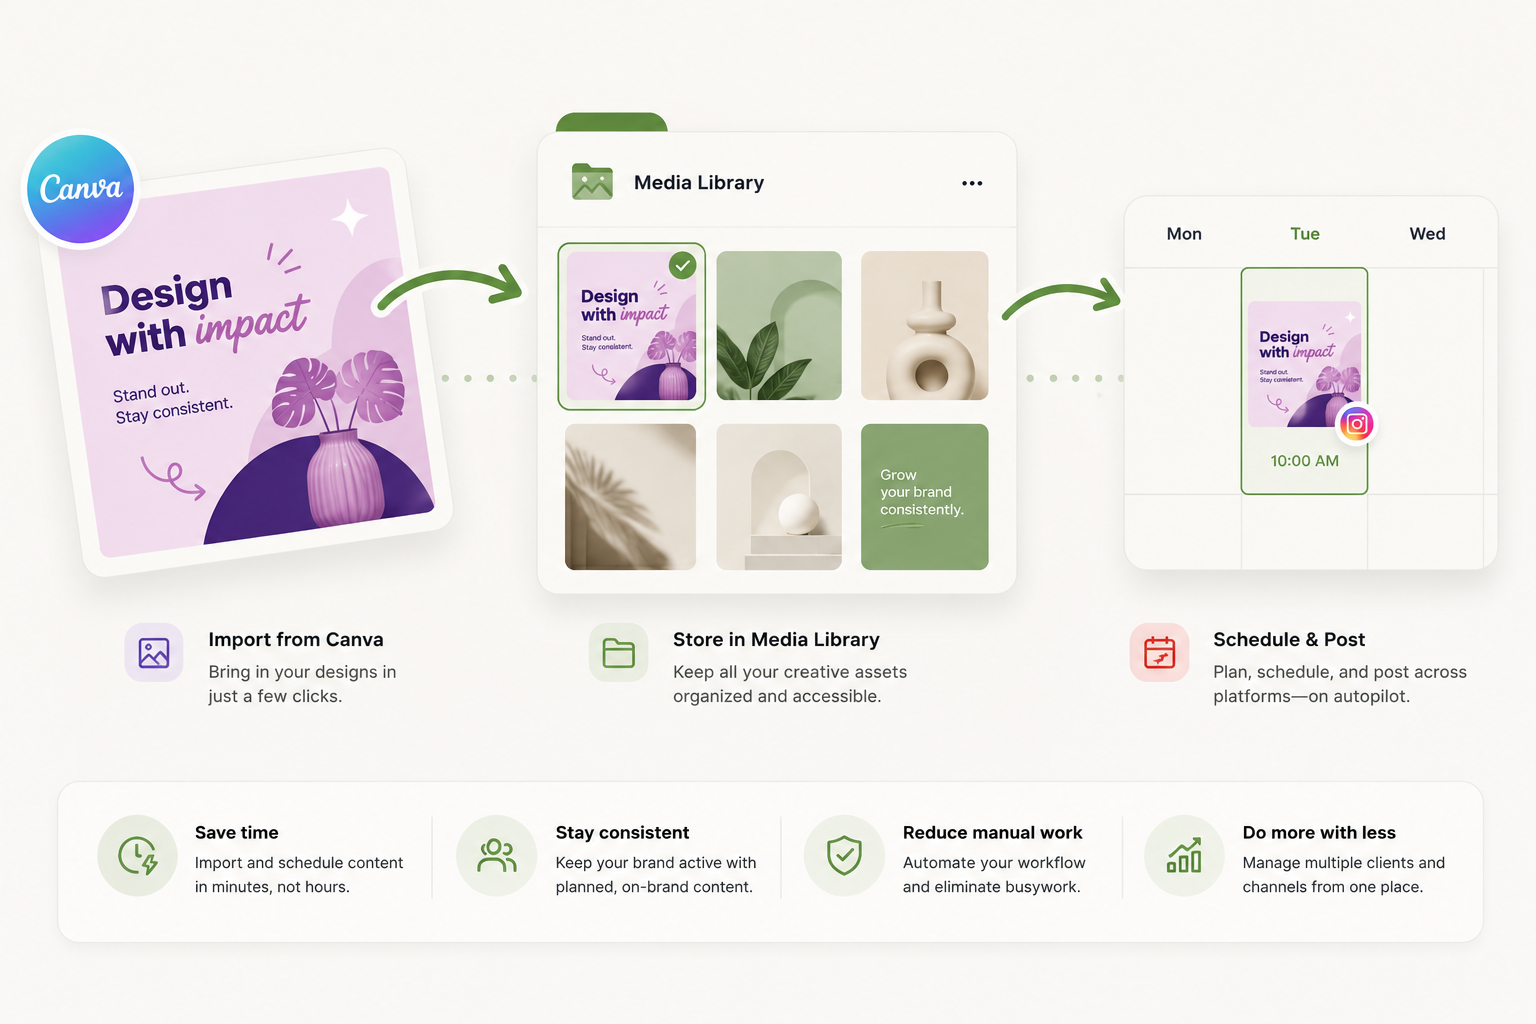
The point of integrating Canva directly into your scheduler is to make the export step disappear. You browse your Canva designs from inside the scheduler, pull them into a media library, and post them. When the design changes, you swap the file, not the workflow.
What you need to schedule Canva designs to social media
Three things have to be true before this works smoothly:
- A scheduler with a real Canva integration. Not a Zapier hack. A native connection that lets you browse your Canva designs and import them into your media library.
- A media library that holds them. You don't want to import the same design four times for four posts. Import once, schedule many.
- Per-platform formatting. A 1080x1080 square works on Instagram, looks cropped on LinkedIn, and is wrong for Reels. Your scheduler needs to handle the differences.
Minopa covers all three. The Canva integration imports designs into the media library, and the scheduler lets you post natively to nine platforms with per-platform tweaks.
The four-step workflow
Here's the actual flow once you've connected Canva to Minopa.
1. Connect Canva once, browse forever
Open the integrations panel in Minopa, find Canva, and authorize the connection. After that, your Canva designs are reachable from inside the media library. No re-login, no re-export. When you create a new design in Canva, it shows up the next time you open the import panel.
[NEEDS SCREENSHOT: Minopa media library with Canva import dialog open, showing a grid of recent Canva designs]
2. Import the design into your media library
Pick the Canva design you want to post and import it into a folder. The media library uses folder hierarchies, so you can keep things organized in a way that actually matches how you work:
- A "Hooks" folder for short-form video covers
- A "Carousels" folder for Instagram and LinkedIn slides
- A "Quotes" folder for evergreen text graphics
- A "Brand assets" folder for logos and watermarks
This part matters more than it sounds. The reason most creators give up on a media library is that it becomes a flat dump of 800 files named Untitled (4).png. Folders fix that. So does naming the design clearly inside Canva before you import.
3. Tweak per platform, in one composer
Open the post composer, select the imported design, and pick the platforms you want to publish to. This is where the per-platform customization matters: the same design can have different captions, different hashtags, and different formatting depending on where it ships.
A few patterns worth knowing:
- For Instagram, keep captions punchy in the first two lines (the "more" cutoff sits there), and put hashtags in a comment or at the bottom.
- For LinkedIn, open with a hook line, leave a blank line, then expand the thought. LinkedIn's truncation is brutal and rewards line breaks.
- For X, strip the hashtag block entirely and lead with the punchline. X is a one-pass platform.
- For TikTok photo posts, mirror the Instagram caption but lean into the trend audio.
You write each version once, in the same composer, and Minopa publishes them natively to each platform.
4. Schedule it on the calendar
Drop the post on the calendar at a specific date and time. Use the month view to see how the week is shaping up. If you need to move it, drag it. If a client asks to push everything from Tuesday to Thursday, drag the whole row.
[NEEDS SCREENSHOT: Calendar month view with three Canva-sourced posts visible, one being dragged from Tuesday to Thursday]
The publish-now option is there too if you finish a design and want to ship it immediately. But the value of having Canva designs already imported is that you can batch them. Design five carousels on Sunday, schedule them across two weeks, and you're done.
Tips that make this stick past week three
The workflow above works on day one. Whether you're still using it on day ninety depends on a few habits:
- Name your Canva files like you'll search for them.
Q2-launch-carousel-v1beatsUntitled design (12). The first one you can find in three seconds. The second one you can't find at all. - Re-import when you redesign. If you update a Canva design after importing it, re-import the new version into your media library. Or use the in-app image editor in Minopa for small tweaks (crop, brightness, format) so you don't have to round-trip to Canva for a 5-second change.
- Mix in non-Canva sources. Canva is great for graphics. For photos and video, pull from Google Drive into the same media library. One library, multiple sources, one scheduling flow.
- Use the calendar as a planning surface, not just an output. Block out content themes a week ahead. When you sit down to design in Canva, you already know what's needed.
Why this is faster than Buffer, Later, or "just doing it manually"
Most schedulers either don't integrate with Canva at all, or they integrate by letting you upload Canva exports the same way you'd upload anything else. That's not integration, that's pretend. The thing you actually want is to skip the export step.
A few reasons Minopa fits the small-creator and freelancer use case here:
- The Canva integration is native. You browse your Canva designs, you don't re-upload them.
- The media library holds imports from Canva and Google Drive in the same place, with folders.
- The composer covers nine platforms (Instagram, Facebook, X, LinkedIn, TikTok, Threads, Pinterest, plus Canva and Google Drive imports), so one design ships everywhere.
- Plans run from Free (one social account, fifteen posts a month) up to agency-scale, so you don't outgrow it after your first month.
If you're starting out and want to test the workflow without paying, the Free plan is the right place to begin. If you're managing more than one brand, the Creator and Growth plans add multi-workspace and team features.
Try the workflow
Pick three Canva designs you've made in the last week. Import them into Minopa, tweak them per platform, and schedule them on the calendar. The whole exercise takes about ten minutes the first time and three minutes after that.
See how the Canva integration works, or compare plans to find the one that fits.